Showing posts with label bind-off. Show all posts

Wednesday, May 19, 2010

Kitchener bind-off

After my love-affair with the tubular cast-on, I have been remiss to re-try its counterpart: the dreaded Kitchener bind-off. I learned to do the Kitchener stitch (aka 'grafting' or 'weaving' seams invisibly) via the TechKnitter and her 'easier' technique. It worked well for seaming up the toes of socks; when I applied it as a bind-off for the bottom of a sweater, it became, how do you say? A hot mess. I finally ripped off the metaphorical Kitchener Band-Aid last night, but this time I tried the 'traditional' method of Kitchener for the bind-off. Here's how it goes...

Kitchener bind-off


Note: This bind-off works for K1P1 ribbing only, and you must have an even number of stitches.

So you've reached the end of your ribbing, and you're ready to bind-off. The first thing you need to do is get yourself a couple of dpns or circulars in the needle size that you're using, as well as a tapestry needle.

Step 1: Slip the first stitch (a knit stitch) purl-wise onto one of the dpns/circs:


Step 2: Slip the next stitch (a purl stitch) purl-wise onto the other dpn/circ:
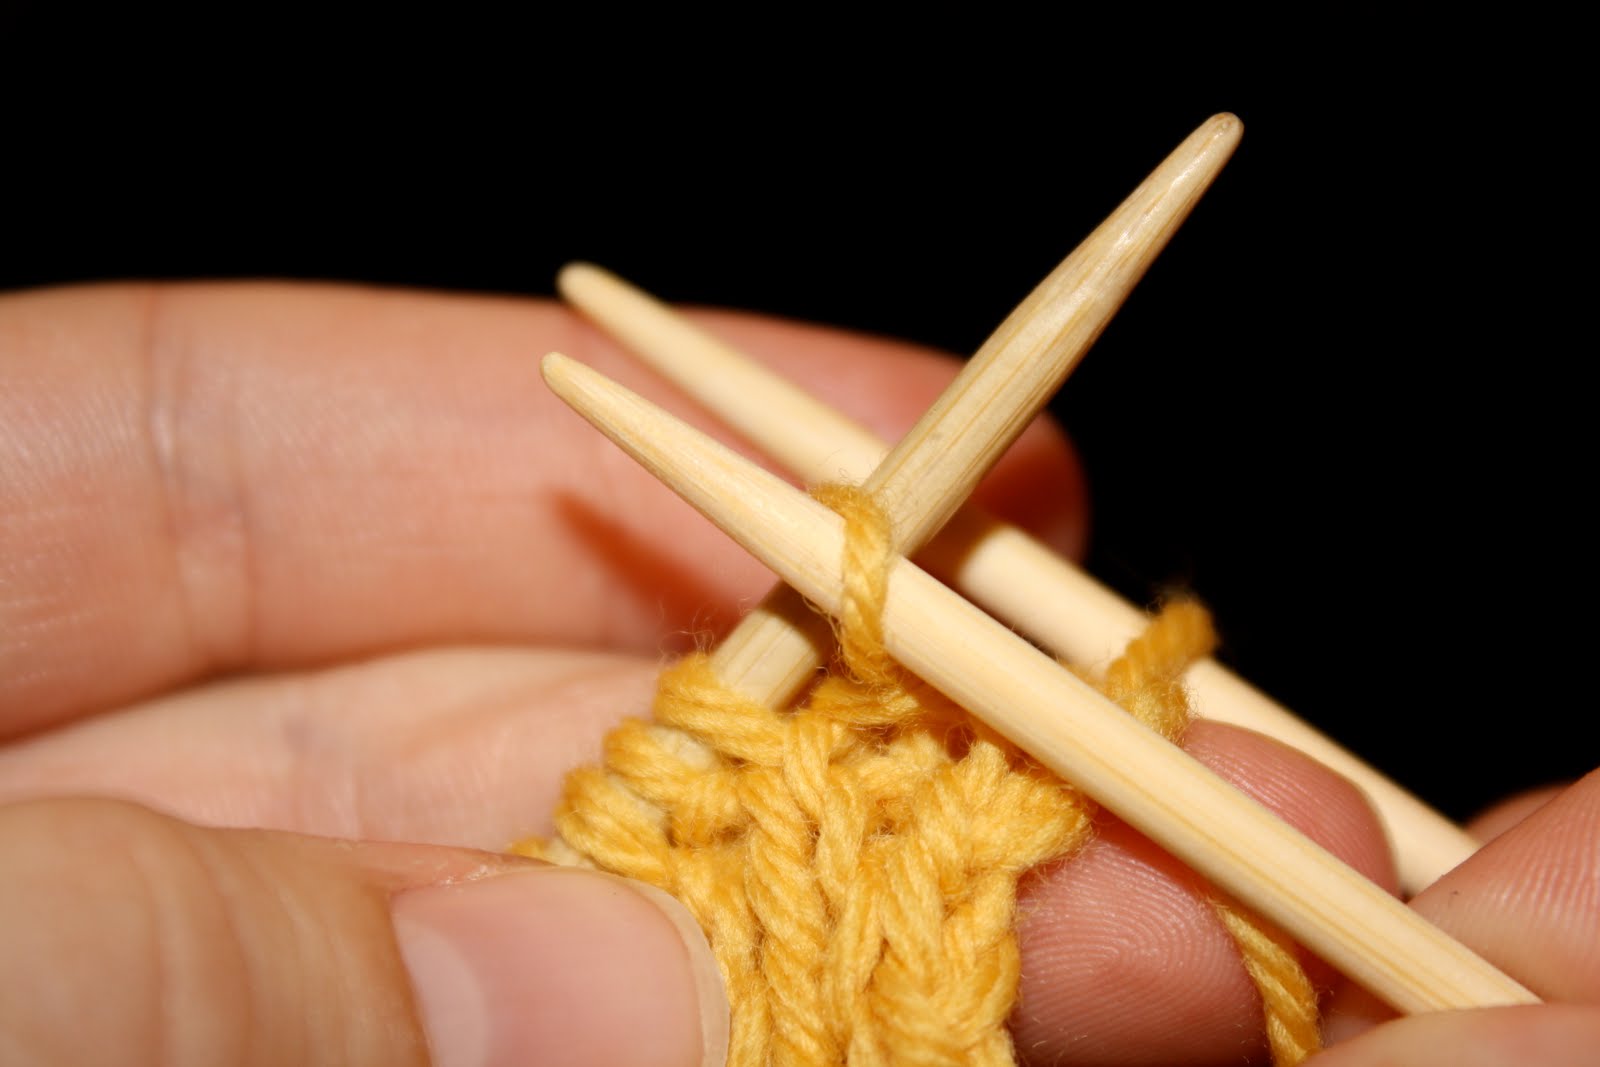


Make sure that the needle with the knit stitches is closest to you, and the one with the purl stitches is in the back (unlike the photo...tsk tsk).

Repeat steps 1 and 2
until you have all the knit stitches on one needle, and all the purl stitches on the other:


Whichever way you turn it, knit stitches should be facing the outside. We'll call the one with the knit stitches on it the 'front needle', and the one with purl stitches on it the 'back needle'.

Now, cut your yarn leaving a tail three times the length of the work that you're binding off, plus an additional 12" for buffer and weaving in purposes. Thread the loose end onto the tapestry needle.

Step 3:
Hook the needle through the first stitch on the front needle as if you were going to purl it:


Pull the yarn through the stitch until the yarn is snug (not tight). Leave the stitch on.

Step 4:
Hook the needle through the first stitch on the back needle as if you were going to knit it:


Pull the yarn through the stitch until it is snug (not tight). Leave the stitch on.

----------------------------------------------


You've set up the first two stitches, now comes the steps that you will repeat.

Step 5: Hook the needle through the first stitch on the front needle as if you were going to knit it:


Pull the yarn through the stitch until it is snug (not tight). Hook the needle through the second stitch on the front needle as if you were going to purl it:


Pull the yarn through the stitch until it is snug (not tight). Drop the first stitch off of the front needle (circled in green):


Step 6: Hook the needle through the first stitch on the back needles as if you were going to purl it:


Pull the yarn through the stitch. Hook the needle through the second stitch on the back needle as if you were going to knit it:


Pull the yarn snugly through the stitch. Drop the first stitch off of the back needle (circled in green):


Phew. You just bound-off two stitches. Repeat steps 5 and 6 until there are two stitches left, one on each needle, like so:


Step 7: Hook the needle through the only stitch on the front needle as if you were going to knit it:


Pull the yarn through snugly, drop the front needle stitch off.
Step 8: Hook the needle through the only stitch on the back needle as if you were going to purl it:


Pull the yarn through snugly and drop the back needle stitch off.


And you're done with 8 simple steps! Guaranteed fun! (Guarantee void everywhere.)

General advice: continually monitor your progress and adjust the tension of the bind-off. Stretch it out after every couple of steps to make sure the yarn is seated correctly and that nothing is tangled up.

I find that using the traditional method, my bind-off is very loose, so I had to go through and tighten it to my liking after every repeat of steps 5 and 6. It takes longer, but the result is worth it.

Try to make sure that the working yarn is always going over the work, but below the needles (so as not to create extra loops). Understanding this takes some practice (and cursing. So practice your cursing too).

The traditional technique is easier and more intuitive to me, but it may not be for you. If this method pisses you off too badly for words, try out the TechKnitter's method (linked in the first paragraph). This is after you've retrieved your work from the window you threw it out of and apologized to the neighbors for introducing their kids to words they'd never dreamed of, of course. In all seriousness, the Kitchener bind-off isn't hard, it just takes a lot of focus and patience. It works best if you do it somewhere quiet with no distractions. Since I'm the type of person that likes to drive to work while grilling hot-dogs and giving myself a sponge bath, that much focus is sometimes hard to obtain.

Tuesday, April 13, 2010

Knit bind-off: last stitch boogaloo

The last stitch of the knit bind-off tends to look a little funky, so what the hey-diddly-do can you do about it? Read on.

So you've bound off all of the stitches but the last one. You've got one stitch left on the right-hand needle, one left of the left-hand needle:


Slip the stitch on the LH needle to the RH needle purlwise (meaning the tip of the RH needle goes though the stitch from the top to the bottom, can also be thought of as from the back of the stitch to the front):

Both stitches are now on the RH needle.


With the LH needle, pick up the loop just below the stitch from back to front:


Now slip the last stitch on the RH needle back to the LH needle, purlwise again:

Two stitches on RH needle, one on LH needle.


Knit the two stitches together:


Two stitches left.


Then bind-off the second stitch as per usual. Break the yarn, allowing at least 6 inches for weaving in the end, and pull the yarn through the very last stitch:


Pull it all the way through and tighten it snugly.

Voila!


The last stitch looks cleaner than if you had just pulled the yarn end through it without the other rigmarole, since it isn't just tightening in on itself anymore.

I love this little finishing tip to prevent an odd looking last stitch. It's just another one of those things to make your work look more professional (not that I don't already know you're a pro)!

Friday, April 9, 2010

Picot bind-off

Now for the companion piece to the picot cast-on. The picot bind-off! I could find very little about the picot bind-off on the interwebs, and the picot bind-off that my trusty The Knitter's Book of Finishing Techniques describes is a method that makes a poor match for the cast-on I previously described. Like the cast-on, there are many variations of the picot bind-off. I've deduced a method using my math skillz that will be the most subtle of the picots and match the previous cast-on. And here she goes....

Picot bind-off

Step 1 - Cast-on one stitch using the cable cast-on:


A quick visual recap of the cable cast-on. See the above link for more details.


Step 2 - Knit two stitches:


Step 3 - Bind-off one stitch using the knit bind-off:

Up n' over, then drop the stitch off. See the above link for more details.


One stitch remains on RHN.

Step 4 - Knit one more stitch.

Step 5 - Bind-off one stitch using the knit-bind off. (One stitch remains on RHN).

Step 6 - Slip the stitch on the RHN to the LHN, inserting the LHN through the stitch from the bottom up:


You've bound-off one stitch using the picot bind-off! Repeat steps 1-6 until all stitches are bound-off. Basically what you're doing is adding one stitch, then taking away two. Here's what it looks like on k1p1 ribbing.


Nice and stretchy! Me likee.

Friday, April 2, 2010

Knit bind-off

Since I got my complaining out of the way, how about some knitting stuff? I'm trying to keep some more of the 'technical posts' how do you say, cleaner? I'm an engineer, I work with mostly dudes all day, and hey, I heard (on Wait Wait! Don't Tell Me no less, so you know it's true) that cursing helps you bond with your co-workers. That being said, my mom reads this site, so, sorry Mom, I'm trying to behave.

For two of the swatches I've made so far, the knitted cast-on and the cable cast-on, the complementary bind-off is the knit bind-off. This is according to The Knitters Book of Finishing Techniques , which is a great collection of techniques including the most common cast-ons and bind-offs and their various advantages and drawbacks. I'd like to officially give it the "AC Engineered Knits Bump", and guarantee that you'll love it (guarantee void everywhere). First things first, let's go over the knit bind-off.

Knit bind-off

Knit two stitches:


Using the tip of your left-hand needle, hook the first stitch on your right hand needle (the one that you knit first):


Pass the first stitch over the second stitch:

Up n' over.


And drop it off the needle. One stitch bound-off!

Booyah!


Knit another stitch so there are two on the right hand needle again. Repeat the procedure until all stitches are bound off. It'll look something like this with ribbing:


I used a needle three sizes larger than the working needle. It's easy to do this bind-off too tightly, so I usually use a larger needle.

But how well does this really match up to the knitted cast-on and cable cast-on? Browsing through the other photos, I would say very well to the cable cast-on, bit of a stretch to the knitted cast-on. The knitted cast-on is usually fairly subtle (especially when you don't do it with a gigantor needle) and I don't think the knit bind-off is particularly subtle. This may just be it's 'best' match, not necessarily a 'good' match. I'm going to keep my eye out for a better one.

April 13, 2010 - Edited to add: For a technique to clean up that last remaining stitch, see the sequel, Knit bind-off: last stitch boogaloo.