Kitchener bind-off
Note: This bind-off works for K1P1 ribbing only, and you must have an even number of stitches.
So you've reached the end of your ribbing, and you're ready to bind-off. The first thing you need to do is get yourself a couple of dpns or circulars in the needle size that you're using, as well as a tapestry needle.
Step 1: Slip the first stitch (a knit stitch) purl-wise onto one of the dpns/circs:


Step 2: Slip the next stitch (a purl stitch) purl-wise onto the other dpn/circ:
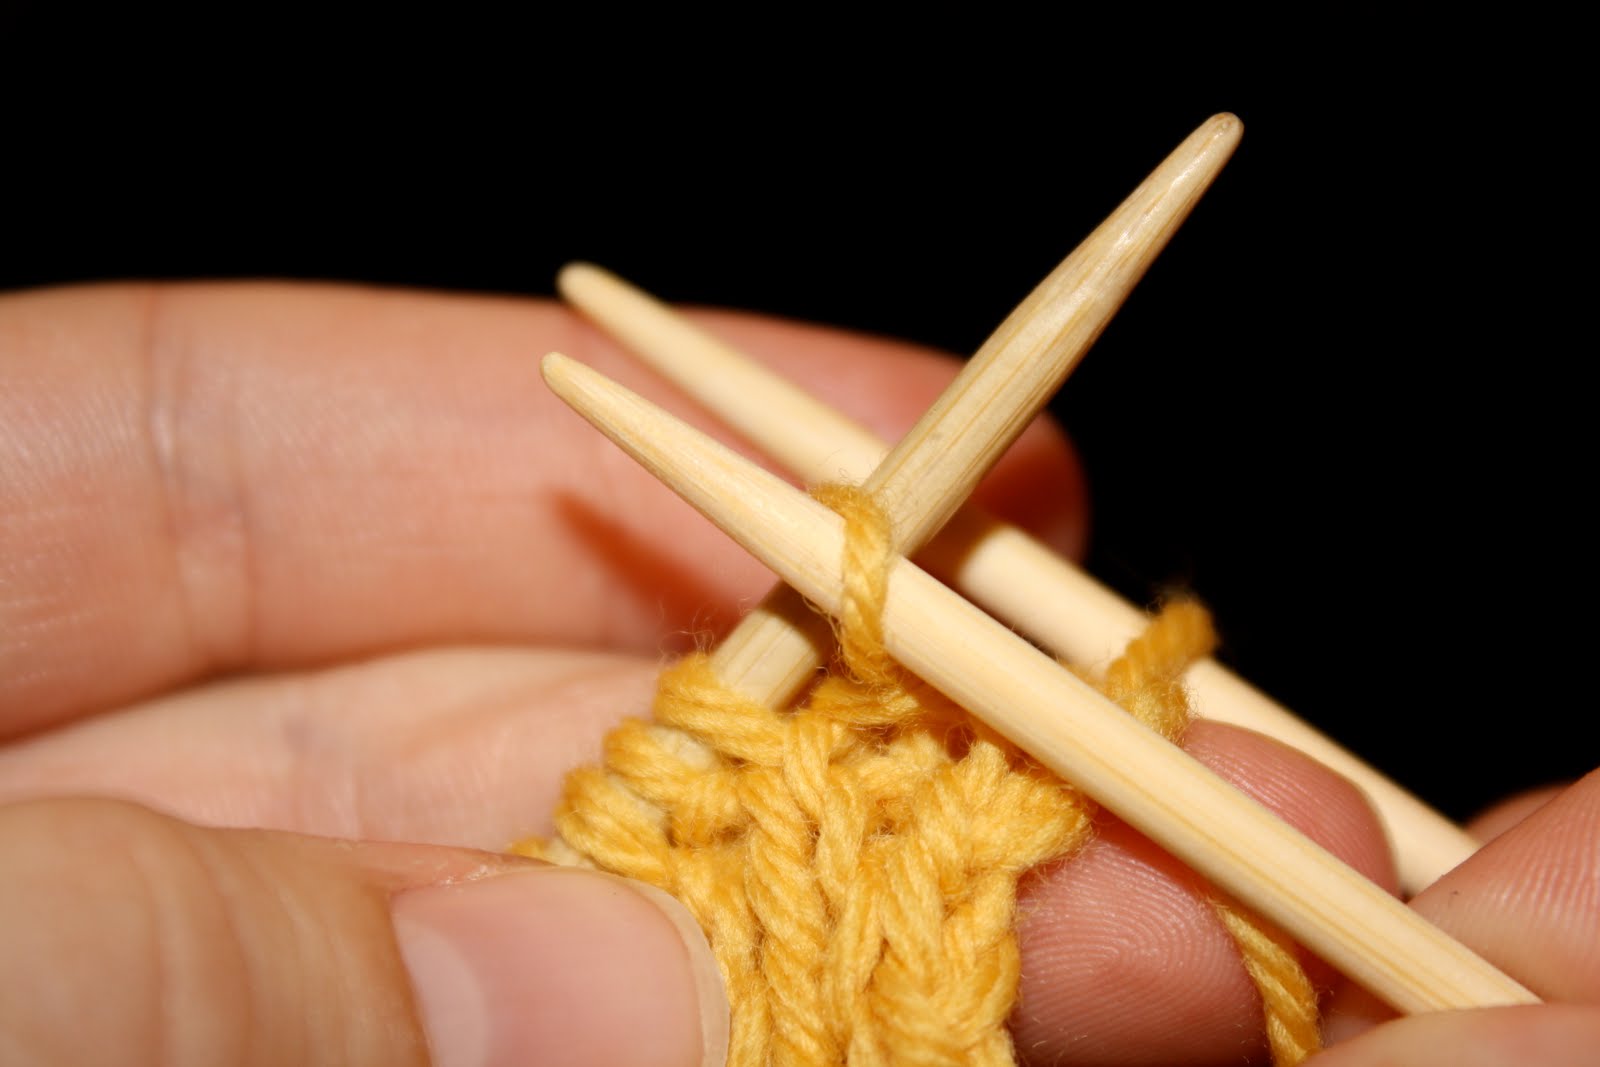

Make sure that the needle with the knit stitches is closest to you, and the one with the purl stitches is in the back (unlike the photo...tsk tsk).
Repeat steps 1 and 2 until you have all the knit stitches on one needle, and all the purl stitches on the other:

Whichever way you turn it, knit stitches should be facing the outside. We'll call the one with the knit stitches on it the 'front needle', and the one with purl stitches on it the 'back needle'.
Now, cut your yarn leaving a tail three times the length of the work that you're binding off, plus an additional 12" for buffer and weaving in purposes. Thread the loose end onto the tapestry needle.
Step 3: Hook the needle through the first stitch on the front needle as if you were going to purl it:

Pull the yarn through the stitch until the yarn is snug (not tight). Leave the stitch on.
Step 4: Hook the needle through the first stitch on the back needle as if you were going to knit it:

Pull the yarn through the stitch until it is snug (not tight). Leave the stitch on.
You've set up the first two stitches, now comes the steps that you will repeat.
Step 5: Hook the needle through the first stitch on the front needle as if you were going to knit it:

Pull the yarn through the stitch until it is snug (not tight). Hook the needle through the second stitch on the front needle as if you were going to purl it:

Pull the yarn through the stitch until it is snug (not tight). Drop the first stitch off of the front needle (circled in green):

Step 6: Hook the needle through the first stitch on the back needles as if you were going to purl it:

Pull the yarn through the stitch. Hook the needle through the second stitch on the back needle as if you were going to knit it:

Pull the yarn snugly through the stitch. Drop the first stitch off of the back needle (circled in green):

Phew. You just bound-off two stitches. Repeat steps 5 and 6 until there are two stitches left, one on each needle, like so:

Step 7: Hook the needle through the only stitch on the front needle as if you were going to knit it:

Pull the yarn through snugly, drop the front needle stitch off.
Step 8: Hook the needle through the only stitch on the back needle as if you were going to purl it:

Pull the yarn through snugly and drop the back needle stitch off.

And you're done with 8 simple steps! Guaranteed fun! (Guarantee void everywhere.)
General advice: continually monitor your progress and adjust the tension of the bind-off. Stretch it out after every couple of steps to make sure the yarn is seated correctly and that nothing is tangled up.
I find that using the traditional method, my bind-off is very loose, so I had to go through and tighten it to my liking after every repeat of steps 5 and 6. It takes longer, but the result is worth it.
Try to make sure that the working yarn is always going over the work, but below the needles (so as not to create extra loops). Understanding this takes some practice (and cursing. So practice your cursing too).
The traditional technique is easier and more intuitive to me, but it may not be for you. If this method pisses you off too badly for words, try out the TechKnitter's method (linked in the first paragraph). This is after you've retrieved your work from the window you threw it out of and apologized to the neighbors for introducing their kids to words they'd never dreamed of, of course. In all seriousness, the Kitchener bind-off isn't hard, it just takes a lot of focus and patience. It works best if you do it somewhere quiet with no distractions. Since I'm the type of person that likes to drive to work while grilling hot-dogs and giving myself a sponge bath, that much focus is sometimes hard to obtain.
If you have a copy of The Knitting Answer book by Margaret Radcliffe you should check out page 97. It gives instructions for a tubular cast off. Basically the kitchener bind off...but without having to put stitches on two different needles. It saves you a step.
ReplyDeleteI will! Anything to make it less complicated. When I was going through the steps, it reminded me of the South Park episode where 'Sexual Harassment Panda' comes to teach the kids about sexual harassment, but just ends up reading legalese aloud and inserting the word 'panda'. "The first party of the first panda may sue the second-party panda unless that panda was said panda aforementioned panda." So many steps that sounds exactly the same...
ReplyDeleteWow! You learn something new everyday. Thanks, AC!
ReplyDeleteYour post is timely! I need to do this bind off for my sock project. I'll be sitting in front of my computer later today and following your tutorial step by step.
ReplyDeleteThanks!
Awesome, I hope it goes well. Persistence is key...and if you don't find the traditional method to your liking, try the TechKnitter version. I find the traditional version more intuitive, but you might not.
ReplyDeleteAwesome pictures!
ReplyDeleteI've done this once, and it worked well for me. I did find I needed to concentrate, though. Binding off in one session is key.
ReplyDeleteAnd I love the Tech Knitter, but sometimes it's just so ... esoteric. I'll go there first, but in many instances keep on going. Oh well. :)